
If your foot flattens excessively when you stand or walk, it can trigger pain not just in your feet—but in your knees, hips, and lower back. One of the most trusted tools clinicians use to detect this issue is the navicular drop test, a simple yet powerful assessment that measures how much the arch of the foot collapses under load. This test helps identify overpronation, flexible flat feet, and abnormal foot mechanics that may contribute to chronic injuries. By measuring the vertical movement of the navicular bone—from a neutral, non-weight-bearing position to full weight-bearing—healthcare providers gain objective data to guide orthotics, footwear choices, and rehabilitation strategies. Whether you’re a runner dealing with recurring shin splints or someone with unexplained knee pain, understanding the navicular drop test can be the key to unlocking long-term relief.
How the Navicular Drop Test Works
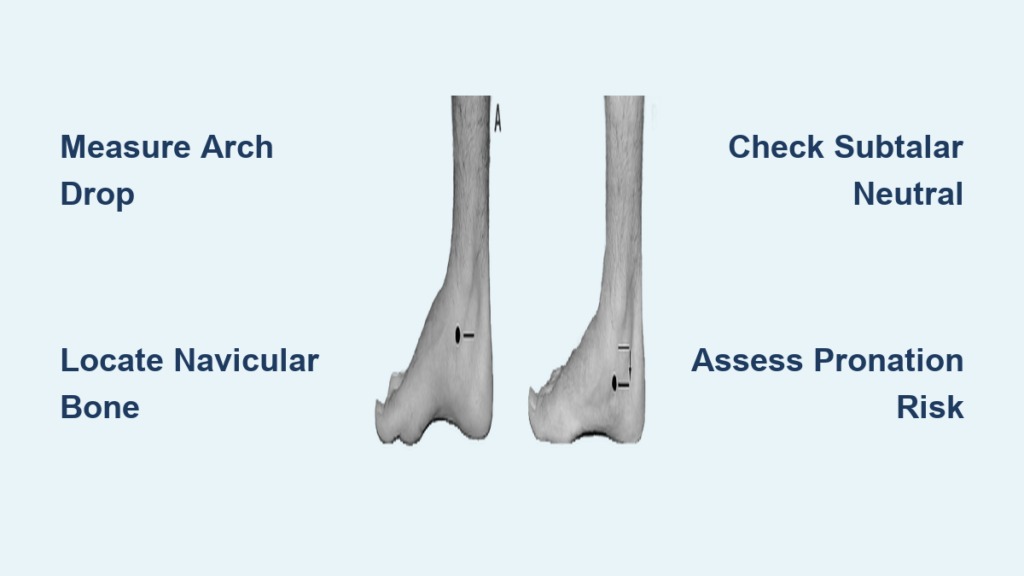
The navicular drop test evaluates how much the medial longitudinal arch (MLA) collapses during weight-bearing by tracking the downward movement of the navicular tuberosity, a bony prominence on the inner side of the foot. This displacement reflects dynamic arch function and serves as a reliable indicator of foot stability and pronation severity.
Locate the Navicular Tuberosity
The first step is identifying the navicular tuberosity, located on the medial side of the foot, just below the ankle bone. To make it easier to palpate:
– Ask the patient to invert and plantarflex the foot, which activates the posterior tibialis tendon and brings the bone forward.
– Use your fingers to feel for the most prominent bump just in front of the medial malleolus.
– Mark this point with a skin-safe pen to ensure consistent measurement.
Accuracy here is critical—misplacing the mark by even a few millimeters can lead to misleading results, especially when tracking progress over time.
Position Subtalar Joint in Neutral
For valid results, the test must begin with the subtalar joint in neutral position, where the talus is aligned evenly between the calcaneus and tibia. This ensures a standardized starting point.
– Palpate the medial and lateral aspects of the talus at the ankle level.
– Gently rotate the foot until equal pressure is felt on both sides.
– Hold this position while measuring the initial height.
If palpation is difficult, some clinicians estimate neutral as the midpoint between maximum supination and pronation. However, experienced practitioners achieve greater accuracy through direct joint palpation.
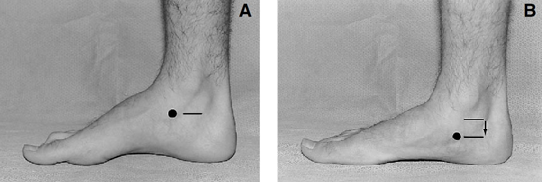
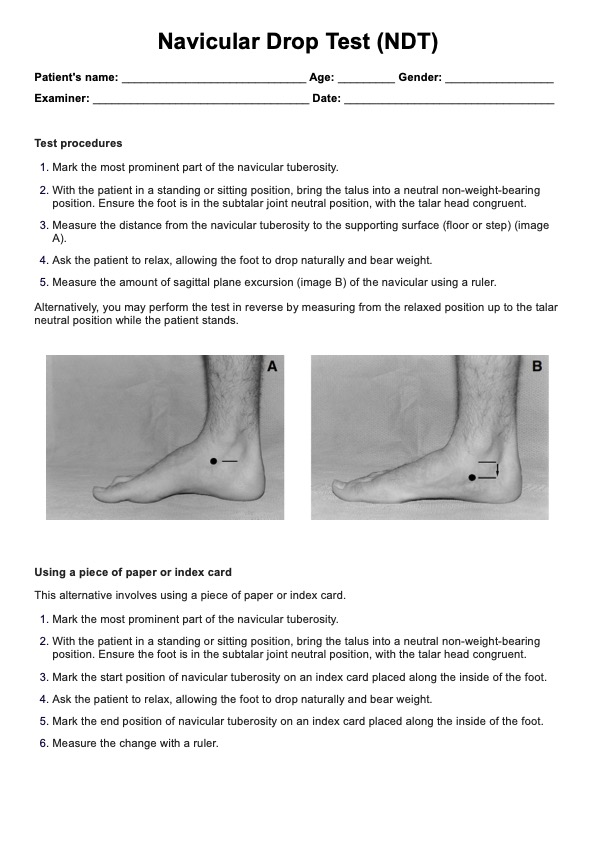
Measure Height in Neutral and Weight-Bearing
With the navicular point marked:
1. Measure the distance from the floor to the marked spot while the foot is non-weight-bearing (sitting or lifted).
2. Instruct the patient to stand naturally, distributing weight evenly across both feet.
3. Re-measure the same point in the relaxed, weight-bearing stance.
Use a ruler held perpendicular to the ground or a fixed vertical scale for consistency. Repeat the process 2–3 times and average the values to minimize error.
Calculate the Navicular Drop
The final step is simple subtraction:
Navicular Drop = Height (Neutral) – Height (Weight-Bearing)
The result, expressed in millimeters (mm), indicates how much the arch has dropped. A larger number means greater arch collapse and increased likelihood of biomechanical dysfunction.
Interpreting Navicular Drop Results
While the raw number matters, context is essential. Absolute values must be interpreted alongside foot size, gender, and symptom presentation to avoid misdiagnosis.
Standard Thresholds for Classification
| Drop Value | Classification | Clinical Meaning |
|---|---|---|
| < 4 mm | Minimal drop | Rigid arch, supinated foot, poor shock absorption |
| 6–10 mm | Normal range | Healthy pronation during gait |
| > 10 mm | Excessive drop | Flexible pes planus, overpronation, high injury risk |
A drop ≥10 mm (1 cm) is widely accepted as the threshold for abnormal pronation. This often prompts recommendations for motion-control shoes or custom orthotics, especially if the patient reports pain.
Adjusted Norms Based on Foot Size and Gender
Larger feet naturally show more arch drop due to longer lever arms. Ignoring foot length risks labeling normal variation as pathological.
– Per 10 mm increase in foot length: +0.40 mm (males), +0.31 mm (females)
– A man with a 28 cm foot may have a 9 mm drop and still be within normal limits.
– The same drop in a woman with a smaller foot could indicate excessive pronation.
Using adjusted norms improves diagnostic accuracy and prevents unnecessary interventions.
Dynamic vs Static Measurements
Static tests (done while standing still) don’t always reflect real-world movement.
– Static NDT: Average drop = 3.6–9.0 mm
– Dynamic NDT (during gait): Mean = 5.3 mm, upper limit = 8.7 mm for 95% of healthy adults
Because static and dynamic values correlate poorly, active individuals benefit from video gait analysis or pressure mapping to assess how the foot behaves during walking or running.
Conditions Linked to High Navicular Drop

Excessive arch collapse doesn’t just affect the foot—it alters alignment throughout the lower body. A high navicular drop is strongly associated with several overuse injuries.
Common Associated Injuries
- Plantar fasciitis: Arch collapse increases strain on the plantar fascia
- Medial tibial stress syndrome (shin splints): Overpronation amplifies tibial loading
- Patellofemoral pain syndrome (PFPS): Internal tibial rotation affects kneecap tracking
- Posterior tibial tendon dysfunction (PTTD): Chronic overuse weakens arch support
- Chronic low back pain: Unilateral overpronation can cause pelvic tilt
- ACL injury risk: Altered lower limb kinematics reduce dynamic stability
Each condition may improve with interventions that reduce excessive foot motion.
Biomechanical Chain Reaction
When the navicular drops too far:
1. The talus tilts medially
2. The tibia internally rotates
3. The femur follows, increasing Q-angle stress
4. The pelvis may tilt anteriorly
5. The lumbar spine compensates, leading to asymmetry
This cascade explains why foot mechanics are foundational to full-body health, especially in runners and athletes.
Reliability and Measurement Accuracy
Despite its simplicity, the navicular drop test is highly reliable when performed correctly.
– Intra-rater reliability (ICC): 0.82–0.95
– Smallest Detectable Difference (SDD): 2.6–3.8 mm
This means a change of at least 3 mm is needed to confirm real improvement after treatment.
Factors That Affect Precision
- Skin movement artifact: The mark may shift slightly under load
- Palpation skill: Experience improves subtalar neutral accuracy
- Measurement tool: Digital calipers or video enhance precision
- Patient positioning: Uneven weight distribution skews results
Best practice: Take 2–3 measurements per foot and average them.
Integrating the Test with Other Assessments
No single test tells the whole story. The navicular drop test is most powerful when combined with complementary tools.
Navicular Drop vs Foot Posture Index (FPI)
| Feature | NDT | FPI |
|---|---|---|
| Type | Quantitative, single metric | Composite score (-12 to +12) |
| Focus | Arch mobility | Overall static posture |
| Use Case | Screening arch collapse | Comprehensive foot typing |
Using both provides a fuller picture: NDT quantifies arch drop, while FPI captures global alignment.
Complementary Diagnostic Tools
- Sit-to-Stand Navicular Drop (SSNDT): Detects functional instability
- Pressure plate analysis: Shows in-shoe force distribution
- 3D gait analysis: Reveals real-time joint kinematics
- Footwear wear patterns: External evidence of pronation
For athletes or chronic pain patients, combining NDT + FPI + dynamic gait review offers the best diagnostic clarity.
Treatment Based on Test Results
Once you know the navicular drop value, interventions can be tailored to the individual.
Orthotic and Footwear Recommendations
| Drop Range | Foot Type | Orthotic Strategy | Shoe Type |
|---|---|---|---|
| < 4 mm | Rigid, supinated | Cushioned, flexible inserts | Neutral, soft-soled shoes |
| 6–10 mm | Normal arch | Minimal support | Standard running shoes |
| > 10 mm | Overpronated | Medial posting, arch lift | Motion control or stability shoes |
Custom orthotics are often recommended for drops >10 mm, especially in symptomatic patients.
Rehabilitation Exercises
Strengthening intrinsic foot muscles and the posterior tibialis can reduce excessive drop over time.
Key Exercises:
- Short foot exercise: Activate the arch without curling toes
- Towel scrunches: Improve toe flexor strength
- Marble pickups: Enhance fine motor control
- Single-leg balance on foam: Challenge proprioception
- Resistance band inversion: Strengthen posterior tibialis
Perform 3 sets of 10–15 reps daily for best results.
Gait Retraining Strategies
For runners:
– Use real-time feedback (mirrors, video, wearable sensors)
– Focus on faster cadence (170–180 steps/min)
– Encourage midfoot striking
– Monitor foot progression angle
Reassess navicular drop after 6–8 weeks to track progress.
When to Use the Test Clinically
The test is valuable for:
– Runners with recurrent injuries
– Patients with unexplained knee or hip pain
– Individuals with flexible flat feet
– Pre-participation screening
– Rehab progress tracking
Red Flags for Intervention
Consider treatment if:
– Navicular drop exceeds adjusted norms
– Asymmetry > 2 mm between feet
– Patient reports pain during weight-bearing
– Worn shoe soles show medial wear
– Positive response to temporary orthotics
Early intervention can prevent long-term joint degeneration.
Historical Development and Evidence Base
First described by Dr. David Brody in 1982, the test has evolved into a cornerstone of podiatric and sports medicine evaluations. Research supports its reliability and moderate-to-good validity, linking high navicular drop to increased injury risk in athletes.
Final Note: The navicular drop test is a powerful, evidence-based tool for identifying abnormal foot mechanics. With a drop >10 mm indicating excessive pronation—and values needing adjustment for foot size and gender—it guides orthotics, footwear, and rehab. When combined with gait analysis and other assessments, it becomes a cornerstone of musculoskeletal evaluation. Whether you’re treating athletes, managing chronic pain, or prescribing supports, understanding this test improves outcomes and prevents injury.